EZClaim Support
Printer Adjustment Walkthrough for Form Filler, Basic and Advanced
Standard Printer Adjustment Walkthrough
- Update your software to the latest release. Open EZClaim, Click Support/Help > Check for Updates. Follow the onscreen instructions. After the software has been updated, continue with the following steps.
- Confirm you are using the correct claims for your printer. If you are using a laser or inkjet printer, you need the single sheet laser forms (do not use claims with 'holes' on the sides). If you are using a dot matrix printer, you should be using the pin feed forms (the claims with 'holes' on the sides).
- Click the File menu, select Printer Adjustment and set the following values:
- Up/Down = 0
- Left/Right = 0
- Bottom Margin = Normal Spacing
- Carrier Area Adjustment Up/Dn and L/R are both = 0
- Vertical Shift Adjustment = 0
- Font Setting = 12pt Courier New - Click the OK button to save the settings.
- Load your printer tray with red pre-printed claim forms.
- Do not use photo-copied forms
- Do not manually feed claims into the printer
- Do not load a single sheet into the tray - Load a patient to use for testing.
- Be sure the 'Print Form and Data' box is UNCHECKED (lower right corner).
- It helps to have the 'Medicare' box checked (top left corner) to match our samples. - Click on a Charge tab that you will use for testing (don't use the New Charges tab).
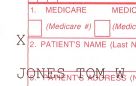
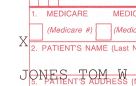
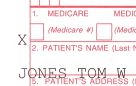
- Print the one claim 3 times in a row to check for consistency. We are looking to see if the paper feeds through the printer consistently. Look for the X in Box 1 on the form. Is the X very close to the same position on all three claims?
**** If the X is not consistently positioned, changing EZClaim settings will not work. The printer must print the same every time for claims to print correctly. ****
If the claims are not consistent, check the following:
- Is the paper tray fully loaded with claims
- Are the claims tight within the tray or is there room for the forms to slide around
- Are the claims 'sticking' to one another because of static
If you are not able to consistently position the data on the claims, you may need to look for another printer. - Using your 3 consistently printed claims as a guide, determine which way the claim needs to be moved. Here is an example from our printer. All 3 X's are very close to the same position. Based on the current X location we determine it needs to move right and up:
- Click the File menu and select Printer Adjustment.
- Based on your samples, enter the appropriate values.
- The Up/Down, Left/Right values are in .01 of an inch.
6 = 1/16 of an inch
12 = 1/8 of an inch
25 = 1/4 of an inch
- In our example, we measured how far the X needs to move up and over and determined it need to move up and over 1/8 of an inch so Up/Down and Left/Right will be set to 12.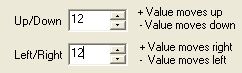
- Click OK to save the settings.
- Print your claim again. Look at the print and see if additional adjustments need to be made.
- In our example, it still wasn't perfect so we switched to Up/Down = 10 and Left/Right = 15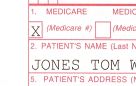
Troubleshooting
Printing problems can be frustrating. Every printer has different issues. The following trouble shooting tips try to address the common printing issues, why they happen and what can be done to fix them.
- Make sure you are using the latest version of EZClaim. Over time based on customer experiences, we may make minor adjustments to the printing system. Your issue may have been addressed in later releases. Click the Support/Help menu > Check for Updates.
- Try 11pt or 10pt Courier New Font. If the data is close but still on the lines in some places, you can try a smaller font. File menu > Printer Adjustment.
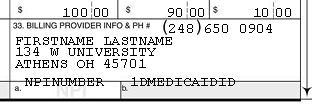
- If Box 33a and 33b numbers are printing on the line, make sure you are using 'Normal Spacing' for the 'Bottom Margin Setting.' Both 'Tight Spacing' and 'Smaller Font' will force the numbers to move up and print on or above the line. Vertical Adjustment may be used as well (see below).
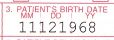
- The date is printing on the hash marks. This is normal if using a 4 digit year in the format MMDDYYYY. Most insurance companies want a 4 digit year and if so, it must be in the MMDDYYYY format.
- Data prints good on the top of the form but is too low or high on the bottom of the form. Check the Vertical Adjustment. Most users can have a setting of 0 in this field. If a value is required, it is usually between -25 and 25.
Document ID: 912
Applies To: EZClaim
Updated: 5/14/2020
Keywords: printing problems NPI printing on line