 to
to 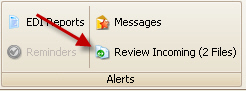
Importing data is done through the Interface system. There are a variety of formats that EZClaim can accept. See Available Interfaces for more information and specifications.
Setting up the program to import data is done through the Interface Library. See Interface Library for more information and specifications. Please contact EZClaim for the latest information on Interface capabilities.
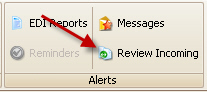
Once the interface has been activated, the program will check for incoming data as needed. On the Ribbon Bar, the ‘Review Incoming’ icon is used for reviewing the ‘incoming data’. When data is ready, the icon will change to show how many files are ready for processing.
to
Clicking the Review Incoming will open the Interface Data Review screen.
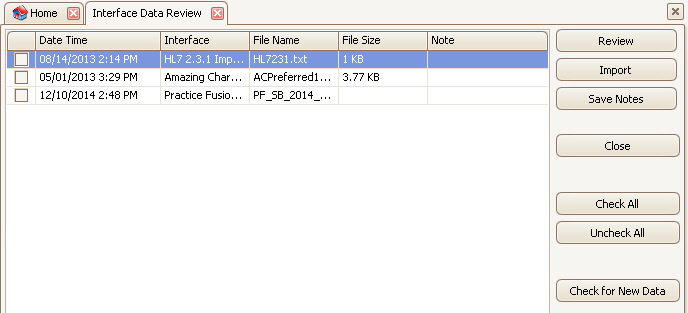
To force the program to check for new data files, click the ‘Check for New Data’ button.
Double click a file shown in the list to open the data review screen.
OR
Place a check next to the files to process and click the ‘Review’ button.

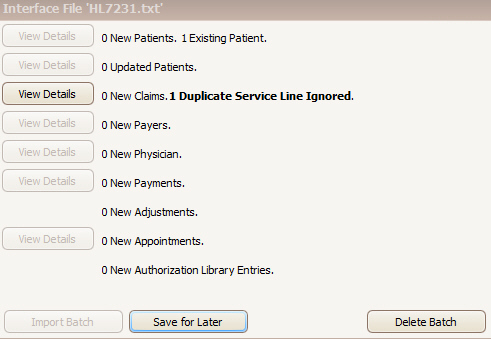
To view additional details of the incoming data, click any of the ‘View Details’ buttons.

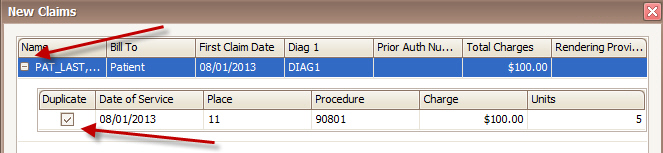
If the program encounters a service line determined to be a duplicate, the user will be notified with a message on the review screen and given an opportunity to view the details:
A user could also “unmark” the service line as a duplicate by expanding the service line details and unchecking:
If multiple entries match physician classification and NPI, the Address 1 field will be used to distinguish between them.
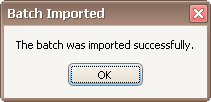
If the summary information looks correct, click the ‘Import Batch’ button. The data will be imported, a confirmation window will be shown, and a log entry will be shown in the lower half of the screen.
Additionally, patients imported this way will have a note indicating the date and time they were imported, who processed the import, along with what interface was used and the file name:

If you would like to import the batch later, click the ‘Save for Later’ button and the program will leave the file in the list.
If the batch contains data you do not want to import, click the ‘Delete Batch’ button. The file will be removed from the list.
1. Place a check next to the files to process.
2. Click the ‘Import’ button to process all the files automatically.
3. Any file that had issues being imported will remain and can be processed individually.