 Home tab >
Libraries > Interface
Home tab >
Libraries > Interface Home tab >
Libraries > Interface
Accessing this library requires ‘ADMIN’ or ‘Full access’ level permissions. See Manage Security Settings for more information.
See Importing Data (via Interfaces) for instructions on importing data.
The “Physician Override” feature is a convenient workaround for situations where data is not exported by your EMR, or the data that is exported needs to be overwritten at the Premier program level before claims can be submitted to payers that have specific requirements based on your credentialing.
Physician Overrides are available for each EMR format (import only) in the Interface Library.
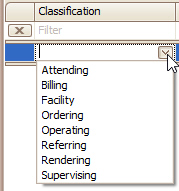
First, click the drop-down arrow in the “Classification” column to see the following selections:
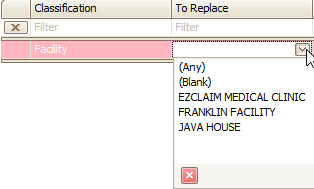
Next, click the drop-down arrow in the “To Replace” column. This will display the Physician Library entries corresponding to the Classification you have selected along with (Any) and (Blank).
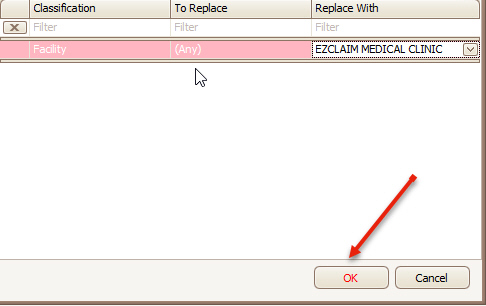
Finally, click the drop-down arrow in the “Replace With” column. Don’t forget to click OK to save the entry.
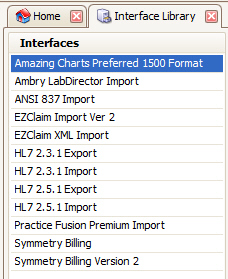
•Amazing Charts Preferred 1500 Format
•ANSI 837 Import
•EZClaim Import Ver 2 – Specifications
•EZClaim XML Import
•HL7 2.3.1 Export
•HL7 2.3.1 Import (ADT^A08 and DFT^P03 message types) – Specifications
•HL7 2.5.1 Import
•Practice Fusion Premium Import
•Interfaces that import data will only run when the program is open.
•Some interfaces are machine and user specific. This means the interface will only run when the user is logged into the machine that the interface was configured on. This is since some parameters are machine/user specific such as mapped drives, etc.
•Interfaces are predefined within Premier. All available interfaces are listed in the ‘Interface Library’.
•Interfaces can be managed by the administrator only.
•Import/Export Interfaces are only active if the Premier program is running on the machine that the interface is configured on.
•Incoming data must be reviewed before being saved to the Premier database.
•Interfaces can be configured on multiple computers.
All interfaces require an Activation code; please contact EZClaim to obtain the activation code. The interfaces available may be different than shown on this screen shot. Contact EZClaim for specific information on available interfaces.

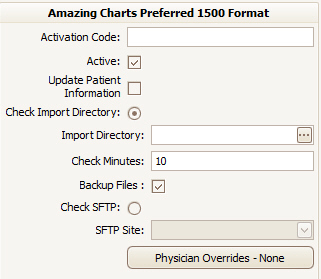
•Activation Code: Code provided by EZClaim to enable the interface.
•Active: If unchecked, the program will not check for new files.
•Update Patient Information: New incoming patient data will overwrite existing data.
•Check Import Directory/Check SFTP: Tells the program whether the files will be accessible through a directory on the user’s network, or whether to use SFTP to pull files from a remote source.
•Import Directory: Location of directory containing the files to be imported.
•Check Minutes: How often the program will check the directory for new files to be added to the interface review screen.
•Backup Files: If checked, copies of the files will be saved in a backup directory in the import directory. The filename will contain the date and time it was brought into the company file.
•SFTP Site: Which site to pull SFTP files from. This is setup in the connection library. See EDI Connection Library for more information on setting up EDI Connection entries. Please note, only the following Secure File Transfer settings are used during the SFTP import:
o User Login
o User Password
o Host Name
o Port
o Download Directory
o Download File Pattern (Optional)
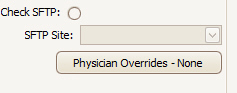
•Physician Overrides: For more information on this feature, please see "Physician Overrides" above.
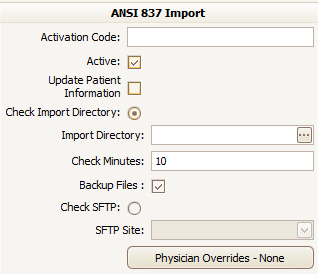
•Activation Code: Code provided by EZClaim to enable the interface.
•Active: If unchecked, the program will not check for new files.
•Update Patient Information: New incoming patient data will overwrite existing data.
•Check Import Directory/Check SFTP: Tells the program whether the files will be accessible through a directory on the user’s network, or whether to use SFTP to pull files from a remote source.
•Import Directory: Location of directory containing the files to be imported.
•Check Minutes: How often the program will check the directory for new files to be added to the interface review screen.
•Backup Files: If checked, copies of the files will be saved in a backup directory in the import directory. The filename will contain the date and time it was brought into the company file.
•SFTP Site: Which site to pull SFTP files from. This is setup in the connection library. See EDI Connection Library for more information on setting up EDI Connection entries. Please note, only the following Secure File Transfer settings are used during the SFTP import:
o User Login
o User Password
o Host Name
o Port
o Download Directory
o Download File Pattern (Optional)
•Physician Overrides: For more information on this feature, please see “Physician Overrides” above.
EZClaim Import Ver 2 will offer feedback if the file is unable to be imported due to a data conversion failure.
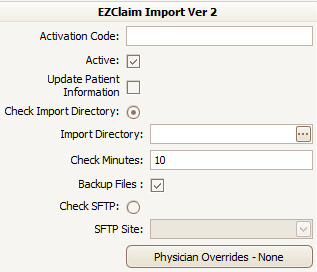
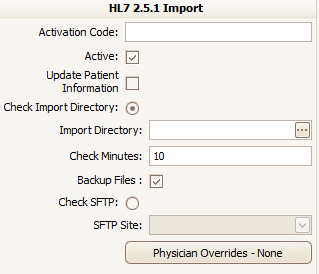
•Activation Code: Code provided by EZClaim to enable the interface.
•Active: If unchecked, the program will not check for new files.
•Update Patient Information: New incoming patient data will overwrite existing data.
•Check Import Directory/Check SFTP: Tells the program whether the files will be accessible through a directory on the user’s network, or whether to use SFTP to pull files from a remote source.
•Import Directory: Location of directory containing the files to be imported.
•Check Minutes: How often the program will check the directory for new files to be added to the interface review screen.
•Backup Files: If checked, copies of the files will be saved in a backup directory in the import directory. The filename will contain the date and time it was brought into the company file.
•SFTP Site: Which site to pull SFTP files from. This is setup in the connection library. See EDI Connection Library for more information on setting up EDI Connection entries. Please note, only the following Secure File Transfer settings are used during the SFTP import:
o User Login
o User Password
o Host Name
o Port
o Download Directory
o Download File Pattern (Optional)
•Physician Overrides: For more information on this feature, please see “Physician Overrides” above.

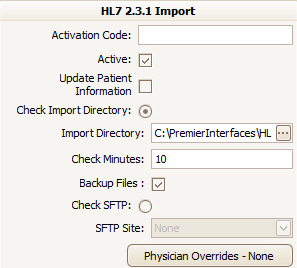
•Activation Code: Code provided by EZClaim to enable the interface.
•Active: Checking this box enables this interface.
•Update Patient Information: New incoming patient data will overwrite existing data.
•Check Import Directory: Enable this if files will not be available via SFTP.
•Import Directory: Location of directory containing the files to be imported.
•Check Minutes: How often the program will check the directory for new files to be added to the interface review screen.
•Backup Files: If checked, copies of the files will be saved in a backup directory in the import directory. The filename will contain the date and time it was brought into the company file.
•Check SFTP: Check this if files will be imported via Secure File Transfer Protocol.
•SFTP Site: Which site to pull SFTP files from. This is set up in the connection library. See EDI Connection Library for more information on setting up EDI Connection entries.
•Physician Overrides: For more information on this feature, please see “Physician Overrides” above.
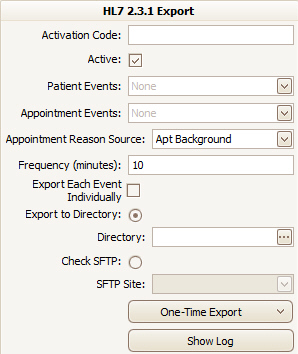
•Activation Code: Code provided by EZClaim to enable the interface.
•Active: Checking this box enables this interface.
•Patient events: Use the pulldown to trigger what events will trigger an export of data.
•Appointment Events: Use the pulldown to trigger what events in the scheduler will trigger an export of data
•Frequency: Set how often exports will be sent.
•Export Each Event Individually: Use this checkbox to have each event sent as a separate export, rather than as a batch.
•Export to Directory: Checking this box enables the user to specify the directory or SFTP site to export to a specified directory.
•Activation Code: Code provided by EZClaim to enable the interface.
•Active: If unchecked, the program will not check for new files.
•Update Patient Information: New incoming patient data will overwrite existing data.
•Check Import Directory/Check SFTP: tells the program whether the files will be accessible through a directory on the user’s network, or whether to use SFTP to pull files from a remote source.
•Import Directory: Location of directory containing the files to be imported.
•Check Minutes: How often the program will check the directory for new files to be added to the interface review screen.
•Backup Files: If checked, copies of the files will be saved in a backup directory in the import directory. The filename will contain the date and time it was brought into the company file.
•SFTP Site: Which site to pull SFTP files from. This is setup in the connection library. See EDI Connection Library for more information on setting up EDI Connection entries. Please note, only the following Secure File Transfer settings are used during the SFTP import:
o User Login
o User Password
o Host Name
o Port
o Download Directory
o Download File Pattern (Optional)
•Physician Overrides: For more information on this feature, please see “Physician Overrides” above.

•Activation Code: Code provided by EZClaim to enable the interface.
•Active: Checking this box enables this interface
•Patient events: Use the pulldown to trigger what events will trigger an export of data
•Appointment Events: Use the pulldown to trigger what events in the scheduler will trigger an export of data
•Frequency: Set how often exports will be sent
•Export Each Event Individually: Use this checkbox to have each event sent as a separate export, rather than as a batch
•Export to Directory: Checking this box enables the user to specify the directory or SFTP site to export to
•Activation Code: Code provided by EZClaim to enable the interface.
•Active: If unchecked, the program will not check for new files.
•Update Patient Information: New incoming patient data will overwrite existing data.
•Check Import Directory/Check SFTP: tells the program whether the files will be accessible through a directory on the user’s network, or whether to use SFTP to pull files from a remote source.
•Import Directory: Location of directory containing the files to be imported.
•Check Minutes: How often the program will check the directory for new files to be added to the interface review screen.
•Backup Files: If checked, copies of the files will be saved in a backup directory in the import directory. The filename will contain the date and time it was brought into the company file.
•SFTP Site: Which site to pull SFTP files from. This is setup in the connection library. See EDI Connection Library for more information on setting up EDI Connection entries. Please note, only the following Secure File Transfer settings are used during the SFTP import:
o User Login
o User Password
o Host Name
o Port
o Download Directory
o Download File Pattern (Optional)
•Physician Overrides: For more information on this feature, please see “Physician Overrides” above.
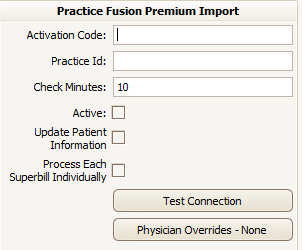
•Activation Code: Code provided by EZClaim to enable the interface.
•Practice Id: This is the Practice ID that is set in Practice Fusion.
•Check Minutes: How often the program will check the directory for new files to be added to the interface review screen.
•Active: If unchecked, the program will not check for new files.
•Update Patient Information: New incoming patient data will overwrite existing data.
•Process Each Superbill Individually: If unchecked, available superbills will be brought into EZClaim as one file for review. If checked, every superbill will show as individual review files. See Review Incoming Files for more information about reviewing incoming data.
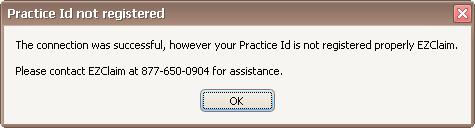
•Test Connection: Click this button to confirm all the settings are correct and the system is registered properly with EZClaim. This will only test the configuration on EZClaim’s side, it will not test Practice Fusion’s configuration. If successful, you will receive the following message:

If you receive a ‘Practice Id not registered’ message, this means the Practice Id entered does not match the one registered with EZClaim’s servers. Please contact EZClaim to confirm.
•Physician Overrides: For more information on this feature, please see “Physician Overrides” above.