 Home tab > Print > Printer
Adjustment
Home tab > Print > Printer
Adjustment Home tab > Print > Printer
Adjustment
Printer adjustment is only required if you are using pre-printed red CMS 1500 forms. If you are billing electronically or the program is printing the black and white form for you, no printer adjustment is required.
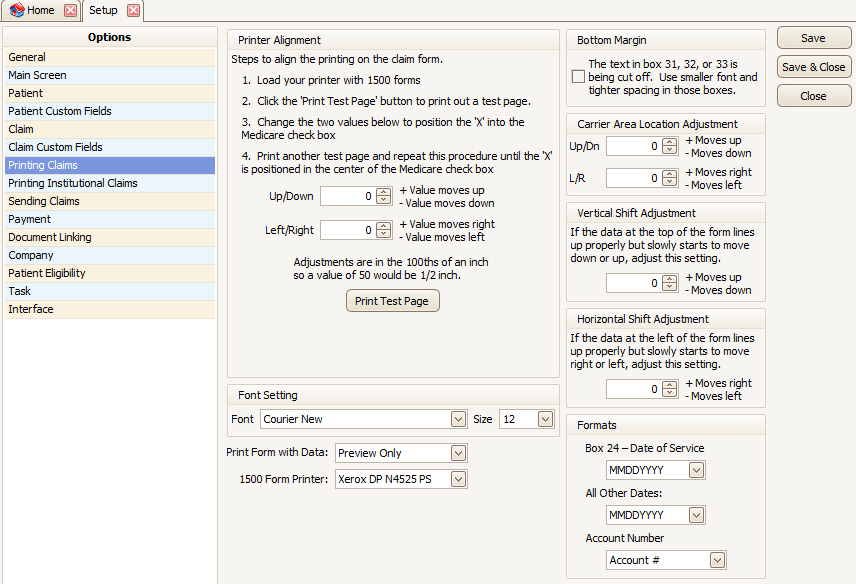
EZClaim will work with any printer that works with Windows Vista (or newer). Follow the steps below and your forms will print out correctly.
Note: After setting printer values you must click on ‘Save’ to set values.
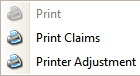
1. Click on Home tab and using the ‘Print’ drop-down select ‘Printer Adjustment’. Admin password required.
2. Load your printer with CMS-1500 forms.
3. Click the ‘Print Test Page’ button. EZClaim suggests re-feeding the same page through your printer as needed to better gauge your progress.
4. Following Printer Adjustment steps, change values until the X is positioned in the center of the Medicare check box at the top of the CMS-1500 form. (Suggestion: Continue using the same CMS-1500 form until adjusted)
5. When adjustment is correct, click on ‘Save’.
TIP: If using the ‘red’ forms, use either ‘Preview Only’ or ‘Never’. Otherwise, a black form will print on top of the red form.
This option allows you to print a black and white form with the data. There are three options:
•Preview Only – The form will only be visible when previewing the claim. When printed, only the data will print. This option is when printing on pre-printed forms only.
•Always – Both the form and data will print. This option should be used when printing on plain paper.
•Never – Only the data will be visible in print preview mode. This option is when printing on pre-printed forms only.
This option allows you to select the printer used for 1500 form printing. Select <Default Printer> to have the program use your default printer.
If the print needs to be shifted up, down, left, or right, use the Printer Alignment settings.

To change the font face or size, select from the options available.
Some printers are unable to print at the very bottom of the paper. If your printer is cutting off the text at the bottom of the page, check this box to have EZClaim use a smaller font in boxes 31, 32, and 33.
This will adjust the location of the insurance address printed at the top of the 1500 form. Sometimes adjustments need to be made to align the Payer address to a windowed envelope.
If data at the top of the 1500 form starts in the correct position but slowly shifts out of the boxes toward the bottom of the form, use this adjustment to correct.
If data on the left of the 1500 form starts in the correct position but slowly shifts out of the boxes on the right side of the page, use this adjustment to correct.
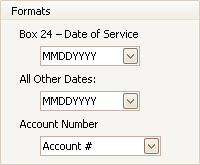
Select ‘Date of Service’ and ‘All Other Dates’ format using the drop-down arrow. Date formats selected will apply to ALL claims.
Most Payers require the 8 digits in this format MMDDYYYY.
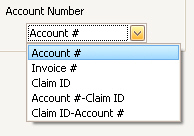
If you would like a different number format for Box 26, select from the account number drop-down list. The available options are:
•Account # – Prints the ‘Account #’ field from the Patient screen.
•Invoices # – Prints the ‘Invoice #’ field from the Claim screen.
•Claim ID – Prints the ‘Claim ID’ from the Claim screen. This is an internal database number automatically assigned by the program and cannot be changed.
•Account #-Claim ID – Prints both the patient account # and Claim ID separated by a dash.
•Claim ID-Account # – Prints both the Claim ID and patient account # separated by a dash.
Note: If you have entered a 4-digit year in the program and it switches back to 2 digits, your Windows Regional settings have the M/D/YY display setting. To change the setting open the Windows Control Panel>Regional Settings>Click the Date tab>Change the Short Date Style field to M/D/YYYY.